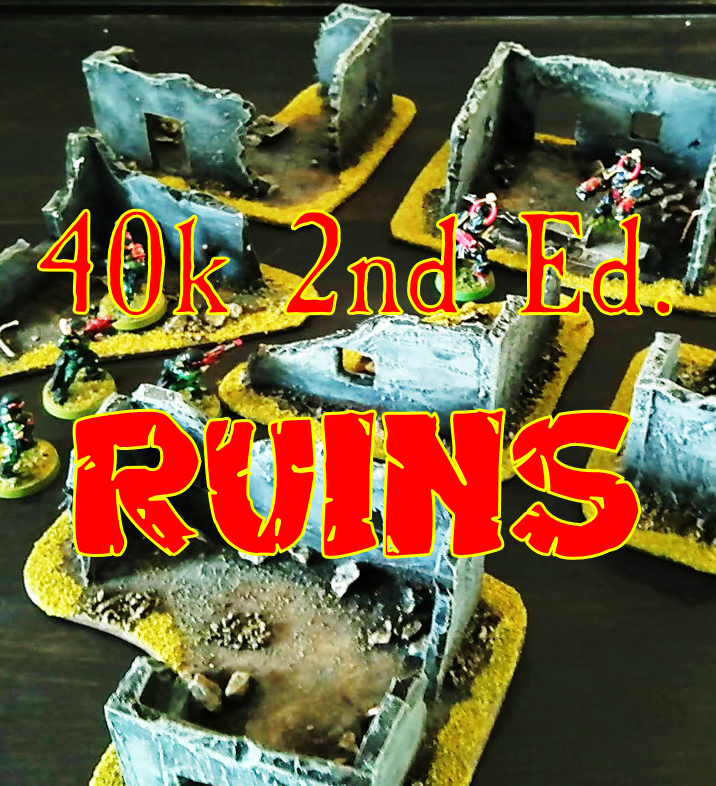
So… once again I attempt to recreate the past with the clear inspiration being everything 2nd Edition. There are some often mentioned tropes with 2nd edition 40k. One is that the terrain is ‘neat’ – almost cartoony… and often covered in green flock no matter the actual piece. I have tried to source a few images for inspiration:

I think this is an absolutely brilliant set of terrain. The green edges and the (neatly cut and completely unburned) ruined buildings. Lovely! The red of the Tyranids just adds to it.
Probably the easiest solution today would be to buy some lasercut MDF terrain for this kind of thing… and it would probably look at lot better too! But – and no disrespect to the MDF out there – I think the homemade terrain gives a different feel. It somehow can’t look oldschool in MDF (prove me wrong!)
For my first few ruins, I wanted something a little more dark and grey. So instead of the adobe style ruins from above, I went with classic plascrete grey stuff. In coming years I might go a different route but for now…
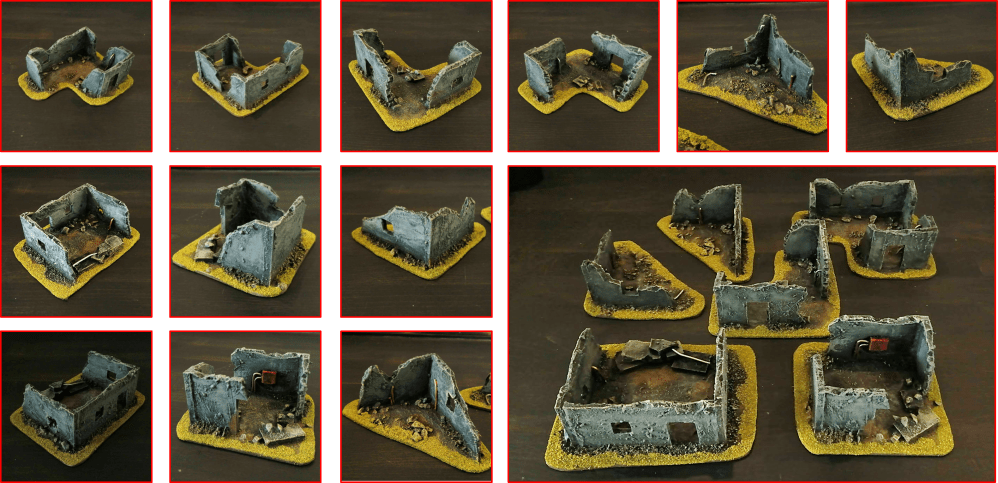
Here are the finished pieces:
And as always I show you all the gritty details about how this was made. No matter how simple a thing that people build I always appreciate this kind of thing myself.
For this build I actually made myself a few dogmas. First of all I wanted to use the dimensions of an IKEA pappis box as the framework to work from. So the bases for the ruins would be made like a jigsaw puzzle from a sheet the size of the inside bottom of the box.

Also I wanted to be able to have at least 4 layers in a box. So in essence I wanted all the ruins to have the same height… as I want some “spacers” in between to project the pieces, I left a bit of air at the top.

Painting-wise I was at a bit of a loss… I knew that black undercoat with grey drybrush would most likely make the ruins very dark. Instead I chose to fully coat them in dark grey before starting the drybrushing. This almost worked… but in summation I think you always want to colour terrain pieces a bit lighter than you expect.

The last few details were made by adding some copper wire and some gravel. I might eventually go back and add a few more details – jerry cans, oil drums, and boxes always makes a good look. But for now I am calling it done.
This is just the first layer, and my ambition is to make 4 layers in total. A few pieces might be made as “doubles” meaning they will be two layers high. We will see.
